After one wet autumn, you notice how a single slick board can turn your deck into black ice. You can’t modernise the look until you’ve checked the basics: rot at joist ends, loose fixings, uneven steps, and handrails that don’t meet current height and loading expectations. Then you add grip strips, improve drainage and ventilation, and choose finishes that stay stable underfoot. Next, you’ll want to see which upgrade gives you the biggest safety gain first…
Key Takeaways
- Inspect decking, joists, ledger, and rails for rot, loose fixings, and deflection; repair or replace any unsafe structural elements.
- Upgrade guards and handrails to local code for height, spacing, and rigidity, ensuring a continuous, easy-grip handrail on stairs.
- Improve slip resistance with exterior-rated anti-slip strips or textured boards on walkways and step nosings, using flush fixings and high-contrast edges.
- Modernise moisture control by adding airflow gaps, joist protection membranes, and reliable drainage that discharges away from footings to prevent ponding.
- Add low-glare, weather-rated step and perimeter lighting with safe cable routing to boost night-time visibility and reduce trips without harsh floodlighting.
Check Your Garden Decking for Safety Risks First
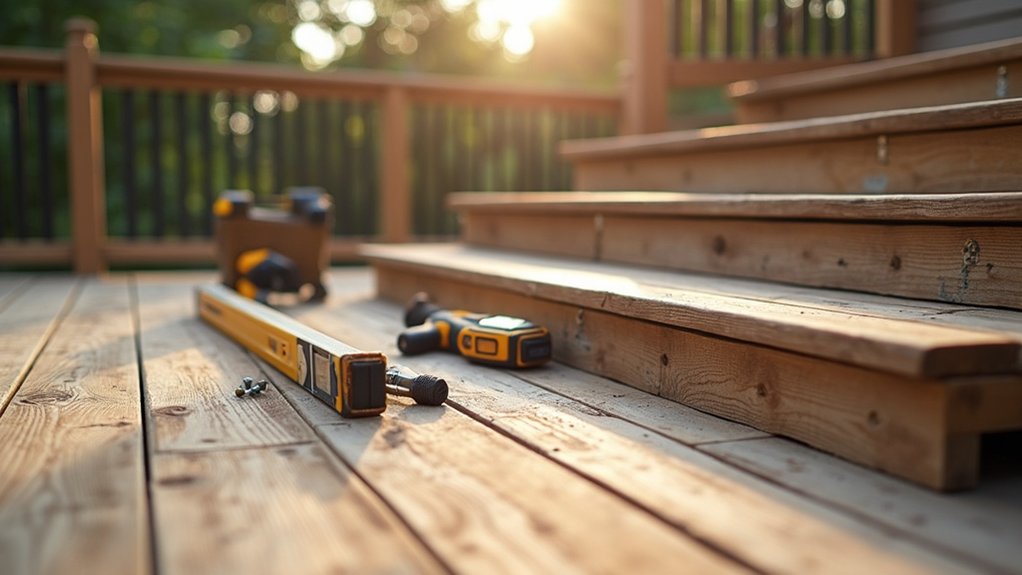
Before you upgrade anything, take a careful safety-first walkover of your existing decking to spot hazards that could put you at risk or cause a new build to fail inspection.
Check for springy boards, protruding fasteners, rot at joist ends, and soft spots around posts. Probe timber with a screwdriver; if it sinks easily, plan replacement, not a cover-up.
Verify handrails feel rigid and meet current height and spacing requirements; don’t assume older builds comply.
Inspect ledger connections, flashing, and drainage so water can’t trap against the house.
Look under the deck for cracked hangers, missing bolts, and inadequate bracing.
Document defects for your contractor and schedule a formal decking inspection to support garden safety and permits.
Fix Slippery Garden Decking With Grip Strips
When rain, algae, or frost turns your garden decking slick, you can reduce slip risk fast by installing exterior-rated grip strips on the main walking lines and at step nosings. Choose UV-stable, screw-fixed or bonded strips rated for wet, oily, and icy conditions, and check they’re suitable for timber or composite boards.
Clean and dry the surface, then mark straight runs so you don’t create trip edges. Keep fixings flush, cap sharp ends, and follow the manufacturer’s spacing and curing times.
For code-aligned outdoor safety, maintain consistent tread coverage on every step and add contrasting colour at nosings for visibility. Inspect annually; replace loose sections immediately.
Grip strips are simple non slip accessories that modernise traction without altering your decking layout.
Improve Drainage Under Garden Decking (Prevent Rot)
To prevent rot under your garden decking, you need to keep water moving and air circulating, not trapped against the joists. You’ll maintain code-compliant ventilation by leaving proper airflow gaps and keeping vents clear so the framing can dry after rain.
Where runoff is a concern, you can add a drainage membrane layer to shed water away from the structure while still allowing drying and access for inspection.
Ventilation And Airflow Gaps
Although decking boards look solid from above, the space beneath them needs deliberate ventilation and airflow gaps so moisture can escape instead of pooling against joists and supports. Build in airflow enhancement by keeping a consistent board-to-board gap and leaving clear perimeter gaps where decking meets walls, posts, or edging.
For code-aware ventilation design, maintain uninterrupted cross-venting: don’t block the underside with stored items, dense planting, or solid skirting without vents. Keep joists elevated above soil, and grade the ground so water can’t sit under the frame.
Inspect that air paths stay open at corners and between bearers, and clear leaves that bridge gaps. Drier framing reduces rot, preserves fastener grip, and lowers slip risk from algae on damp boards.
Install Drainage Membrane Layer
Airflow gaps keep framing drier, but you’ll get better rot protection if you also manage the water that drops through the boards.
Install a Waterproof membrane over joists and bearers, lapped shingle-style so water sheds toward an exit edge. Run it continuously to a gutter strip or drain channel, then connect that to a simple drainage system that discharges away from footings and paths.
Keep the fall at roughly 1:80 so water can’t pond, and leave inspection access at the perimeter. Seal membrane penetrations around posts with compatible tape or boots, and don’t trap timber against masonry.
Check local building rules for minimum clearances and ventilation, then test with a hose before refitting boards.
Swap Decking Boards: Composite vs Treated Timber
When you swap decking boards, you’ve got to weigh composite against treated timber for durability and rot resistance, especially in damp zones where code-required clearances and ventilation matter.
You should also check grip and comfort underfoot—pick boards with proven slip resistance, keep fasteners flush, and follow manufacturer span and fixing schedules.
Finally, compare appearance and heat build-up in sun so the finished deck looks right and stays safe to use barefoot.
Durability And Rot Resistance
How long your upgraded deck stays safe underfoot comes down to rot resistance and how well the boards handle constant moisture and UV exposure. Composite boards excel at weather resistance because they don’t absorb water like timber, so you reduce swelling, splitting, and fungal decay that can loosen fixings and create trip hazards.
They also maintain material longevity with less risk of hidden rot around fasteners.
If you choose treated timber, verify the correct use class and preservative treatment for above-ground exterior decking, then seal cut ends and keep clearance from soil to meet typical code intent.
Install with proper spacing for drainage and ventilation, and inspect annually for soft spots, end-grain checking, and fastener corrosion.
Replace any compromised boards immediately to keep load paths reliable.
Grip, Comfort, And Appearance
Although both composite and treated timber can look great, your footing and day‑to‑day comfort depend on the board profile, surface texture, and how each material behaves in rain, frost, and full sun. Choose grooved or embossed composite for consistent grip, and check the manufacturer’s slip‑resistance rating for wet areas near doors, steps, and pool edges.
With treated timber, specify boards with anti‑slip inserts or a fine-sawn face; keep them free of algae and splinters to maintain traction.
For comfort, composites stay uniform underfoot, while timber can cup, raise grain, and need sanding.
For appearance, use texture variation to reduce glare and hide scuffs, and plan color coordination with handrails and nosings for clearer edge definition.
Seal and Finish Decking for Low Maintenance

Ever wonder why some decks stay sharp-looking for years while others turn gray and splintered in a single season? You’ll get longer life and safer footing when you seal and finish boards with the right Protective coatings and aesthetic enhancements.
Start by cleaning, brightening, and letting timber dry to the manufacturer’s moisture spec; trapping water invites rot and slippery algae. Sand raised grain and round sharp edges so you reduce splinters and trip hazards.
Choose a slip-resistant, exterior-rated sealer or stain, and confirm VOC limits and cure times meet local rules. Brush into end grain, gaps, and fastener heads, then back-brush to avoid puddles.
Recoat on schedule, and spot-treat worn lanes before the surface breaks down.
Fit Solid Decking Handrails and Balustrades
Before you pick up a drill, confirm your local code for guard height, baluster spacing (often a 4‑inch sphere rule), and load requirements so the handrail and balustrade actually prevent falls.
Map post locations at corners, ends, and any change of direction, then fasten posts to rim joists with rated brackets and through‑bolts, not screws alone. Keep fasteners corrosion‑resistant and compatible with treated timber.
Choose handrail styles that give a continuous, easy grip, return to posts to reduce snags, and sit at the required height along all open edges.
Select balustrade materials for strength and durability: powder‑coated aluminium, stainless cable with approved spacing, toughened glass with certified clamps, or composite infill.
Check for deflection, sharp edges, and gaps after installation.
Make Garden Decking Steps Safer and Even
Because uneven steps cause most deck-related slips and trips, you should start by checking that every riser height and tread depth stays consistent from top to bottom and meets your local code (a small variation can still create a toe‑catch). Measure each step, then plane, pack, or rebuild any out-of-tolerance framing so your nosings align and the stringers stay sound.
Replace split treads, secure fasteners flush, and add code-approved slip-resistant strips or textured boards where footwear gets wet. Keep the landing firm and level, with proper drainage so water can’t pond on the approach.
Maintain safe headroom and a clear width free of pots. For Garden aesthetics, use planting integration beside the stair run, but keep foliage trimmed back to preserve sightlines and traction.
Add Low-Glare Decking Lights for Nights
When you add low-glare decking lights, you make night-time footing clearer without creating harsh hotspots that ruin depth perception. Choose recessed step, riser, and perimeter fixtures that direct light downward and shield the source, so you cut glare at eye level.
Space lights evenly to maintain consistent contrast across boards, edges, and handrails, and avoid dark gaps near changes in level.
Use weather-rated fittings (IP65 or higher) and corrosion-resistant housings, and route cables in conduit with outdoor-rated connectors to support code-compliant installation.
If you prefer solar powered lighting, confirm battery capacity and automatic dusk sensors, and keep panels unobstructed.
Aim for an ambient glow, not floodlighting, and verify all trip points remain visible from approach paths.
Frequently Asked Questions
Do I Need Planning Permission to Upgrade or Replace Garden Decking?
You usually don’t need planning permission to replace like-for-like decking, but you must check local permitting requirements and renovation restrictions. If you raise height, expand footprint, or add balustrades, you’ll likely need approval.
What’s the Average Cost of Modernising an Existing Garden Deck?
You’ll typically spend £1,500–£6,000 to modernise an existing garden deck—tired boards beside crisp, code-compliant finishes. Costs vary with decking material options and safety upgrade features like slip-resistant surfaces, secure balustrades, and proper fixings.
How Long Do Composite Boards Typically Last in the UK Climate?
In the UK climate, composite boards typically last 20–30 years, depending on material durability and weather resistance. You’ll extend lifespan by ensuring compliant joist spacing, proper ventilation, and slip-tested surfaces, plus routine cleaning, inspections.
Can I Install Decking Upgrades in Winter or During Wet Weather?
Yes, you can—nearly 30% of slip incidents involve wet surfaces, so plan carefully. For Winter installation, check frost, cure times, and fixings. Wet weather challenges demand dry substrates, sealed cuts, and code-compliant anti-slip finishes.
Which Decking Colours and Patterns Best Match Modern Garden Design?
You’ll match modern gardens with cool greys, matte charcoals, and warm taupes—top decking colour trends—plus modern pattern options like wide boards, diagonal runs, or herringbone. Choose UV-stable, slip-rated finishes that meet local codes.
About the Author