Like a careful steward turning a key, you start by deciding what must stay and what can change. You commission measured surveys, check roof lines for slipped slates, and trace damp to its source before you touch plaster or joinery. You draught-proof sash windows with discreet brush seals, retain original boards where they’re sound, and plan services so pipes and cables don’t scar old fabric. But the first room you tackle will set the tone—so where do you begin?
Key Takeaways
- Start with measured drawings, photo logs, moisture mapping, and borescope checks to separate must-save features from reversible upgrades.
- Weatherproof first: repair roof slates, lead flashing, gutters, and lime repointing to stop damp while keeping walls breathable.
- Reduce drafts discreetly by fixing sashes, shutters, thresholds, and adding brush seals without altering original joinery.
- Upgrade entry and exterior with repaired period doors, correct ironmongery, warm shielded lanterns, and traditional gravel or setts paths.
- Renovate room-by-room: conserve kitchen trim and pantry, fix bathroom leaks and ventilation, and improve bedrooms with sash repairs, attic insulation, and sealing.
Plan the Gate Keepers Lodge Renovation (Budget, Surveys, Order)

Before you lift a chisel or order a sash cord, set a renovation plan that respects the Gate Keepers Lodge’s original fabric and sequence of work.
Start with Budget planning: separate “must-save” elements (joinery, plaster, floorboards, ironmongery) from reversible upgrades, and hold a contingency for hidden decay and specialist labour.
Use survey techniques that suit an older lodge: measured drawings, room-by-room photo logs, moisture mapping, borescope checks in voids, and paint stratigraphy at trims to guide finishes.
Record what’s original, what’s later, and what’s failing, then write a schedule of works that prioritises structural stability, services routes that avoid cutting historic members, and trials in discreet areas.
You’ll brief trades clearly, price accurately, and keep changes documented.
Seal the Gate Keepers Lodge Envelope (Roof, Damp, Drafts)
Start by making the roof watertight: repair slipped slates or tiles like-for-like and renew lead flashing and soakers to traditional details at chimneys, valleys, and abutments.
Next, tackle damp at its source by clearing gutters and ground levels, then use breathable, period-appropriate measures rather than hard cement or impermeable membranes that can trap moisture in old masonry.
Finally, stop draughts without suffocating the building—fit discreet brush seals and repair sash cords, shutters, and door thresholds so you cut air leakage while preserving historic fabric.
Roof Repairs And Flashing
Where does damp usually sneak into a Gate Keepers Lodge first? At the roof: slipped slates, failed ridges, and tired leadwork around chimneys and dormers.
Start by surveying from ground and loft, noting staining, daylight pinpricks, and nail sickness.
Keep original slate if sound; lift, dress, and relay on like-for-like battens, using copper nails and breathable underlay that suits a historic build-up.
Re-bed ridge tiles in lime mortar, not hard cement, so movement doesn’t crack the joints.
For storm resistant roofing, add discreet eaves support trays and secure verges with traditional fixings.
Your flashing installation should use code-appropriate lead, proper laps, and stepped soakers, chased into masonry and wedged neatly for longevity.
Dampproofing And Draught Sealing
Although the roof often gets the blame, damp and draughts usually creep into a Gate Keepers Lodge through the junctions—suspended timber floors at external walls, chimney breasts, leaky rainwater goods, and ill‑fitting sashes and doors—so you’ll get better results by sealing the envelope methodically rather than “tanking” rooms.
Start outside: clear gutters, renew cracked hoppers, and repoint with lime to keep walls breathable.
Under floors, improve sub‑floor ventilation, then fit joist-end moisture barriers and patch air paths at skirtings with lime mortar, not foam.
At sashes, add brush piles, refit parting beads, and use a discreet draught strip to retain the historic line.
For insulation techniques, choose vapour-open woodfibre and seal around chimney throats and loft hatches.
Test after rain.
Upgrade the Gate Keepers Lodge Entry (Door, Lighting, Path)
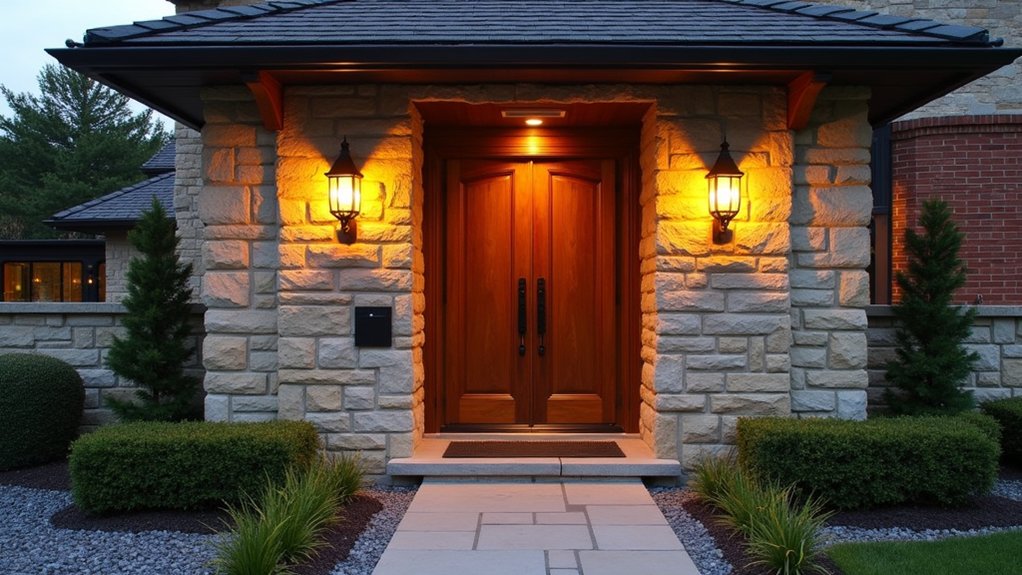
Before anyone steps inside the Gate Keepers Lodge, the entry sets your preservation standard—so upgrade it with materials and proportions that match the building’s era. Keep the door’s thickness, panel layout, and rail-and-stile profiles true to period joinery; repair before you replace, and use traditional paint layers rather than glossy modern films.
For Entryway aesthetics, retain original ironmongery where possible, or source unlacquered brass or blackened steel in historically correct patterns.
Choose lighting that reads as discreet service hardware: a simple lantern with warm output, shielded to protect night views and avoid glare on masonry.
Improve approach lines with pathway materials like brick pavers, gravel, or stone setts, laid to shed water and edged in stone; avoid poured concrete ribbons.
Update the Lodge Kitchen Without Losing Character
Once the entry announces the Lodge’s period character, the kitchen needs to carry it through in everyday use without turning into a showroom remodel. Start by saving original trim, beadboard, and any built-in pantry; strip paint carefully and repair, don’t replace.
If cabinets are missing, choose simple inset fronts, face-frame construction, and unlacquered brass or iron latches to echo early hardware. Keep countertops quiet: soapstone, oiled wood, or honed stone read authentic and wear well.
Add Vintage charm with a freestanding Hoosier-style cupboard, schoolhouse shades, and a bridge faucet, but hide modern convenience in panel-ready appliances and a slim vent hood.
Use linoleum or narrow plank flooring, and match new casings to old profiles.
Refresh Lodge Bathrooms (Layout, Leaks, Ventilation)
Because lodge bathrooms take the most daily abuse in the smallest footprint, you’ll get the best preservation results by fixing layout pinch points, stopping water at its source, and moving damp air out fast—without stripping away original plaster, beadboard, or trim.
Start by mapping door swing, lavatory clearance, and tub access; shift a vanity a few inches or swap to a wall-hung basin to open circulation while keeping historic proportions.
Hunt leaks at supply stops, trap joints, and the tub shoe, then replace failed washers, escutcheons, and cracked putty before rot spreads.
Choose bathroom fixtures with simple, period-appropriate profiles and repairable valves.
Add quiet, ducted ventilation systems to the exterior, not the attic, and seal penetrations so moist air can’t migrate into framing.
Make Lodge Bedrooms Warmer, Quieter, Brighter
Although lodge bedrooms look simple on paper, you’ll feel a dramatic difference when you tighten the shell, tame sound paths, and tune the light without erasing the room’s original character.
Start at the windows: repair sash cords, add bronze weatherstripping, and bed the glass with linseed putty before you choose layered window treatments that respect the trim.
For warmth, seal baseboards, insulate attic slopes from above, and use a small cast-iron radiator or discreet low-profile panel that won’t fight the period.
Quiet the room by caulking casing gaps, lining the door with a thin perimeter seal, and adding a wool rug over repaired boards.
If you’ve got a hearth, restore the surround and damper for safe, steady fireplace ambiance.
Keep paint colors light, and swap in warm LEDs behind opal shades.
Frequently Asked Questions
What Planning Permissions Apply to Renovating a Gate Keepers Lodge?
You’ll need planning permission if you alter the lodge’s exterior, footprint, or use; listed status adds consent. Picture smoke curling from a brick chimney: choose authentic building materials, consult conservation officers, and follow historical preservation rules.
How Do I Insure the Lodge During Renovation Work?
You’ll need specialist insurance coverage for an occupied-or-vacant historic build: declare works, keep sums insured current, add public liability and contractor’s all-risks, check renovation warranties, document original fabric, and secure sites nightly.
Can I Claim Grants or Tax Relief for Heritage Upgrades?
Yes—you can, and as you uncover original fabric, you’ll often find eligibility too. You should pursue heritage funding and tax incentives via listed-building grants, conservation-area schemes, and reliefs tied to authentic materials, methods, and compliant records.
How Long Does a Full Lodge Renovation Typically Take?
You’ll typically spend 6–18 months on a full lodge renovation. Historical preservation surveys, consents, and bespoke joinery extend timelines. You’ll speed progress with tight Budget management, staged trades, and prompt procurement.
How Do I Find Contractors Experienced With Period Lodges?
Start like Sherlock: you’ll find period-lodge contractors by targeting heritage-trade directories, conservation-accredited builders, and local preservation officers. Prioritize Historical authenticity in your Contractor selection; verify case studies, lime-mortar skills, and references on comparable listings.
About the Author