You can fix a sticking interior door fast if you start by finding exactly where it rubs. Close it slowly and watch the reveal, then mark contact points with a pencil or painter’s tape. Grab a screwdriver, level, and a straightedge to check hinge alignment and frame twist. Tighten loose hinge screws first, because that alone often changes everything—then you’ll know whether you need shims, a strike-plate tweak, or a light pass with a plane.
Key Takeaways
- Close the door slowly and use paper or feeler gauges to find snag points, then mark rub areas with painter’s tape and pencil.
- Tighten all hinge screws, replacing stripped ones with 3-inch screws into studs to correct sagging and improve alignment.
- Shim behind hinge leaves with thin cardboard or veneer to shift the door away from the jamb until the reveal is even.
- Reposition or file the strike plate opening so the latch enters smoothly without forcing or rubbing during closure.
- Sand or plane the sticking edge in small passes, test-fit often, and seal fresh wood to prevent future swelling and sticking.
Find Where the Interior Door Rubs
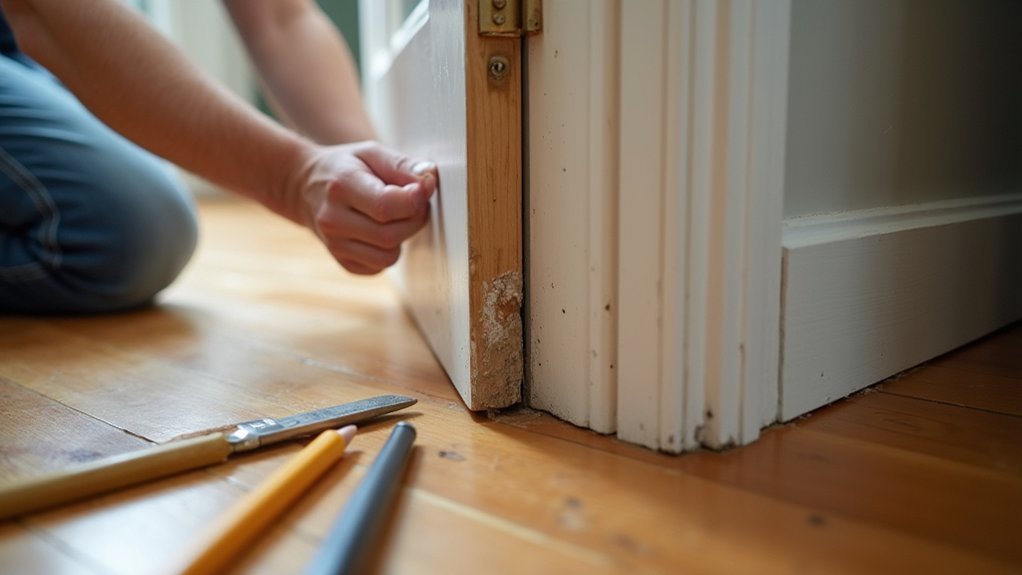
Before you grab a plane or sandpaper, pinpoint exactly where the door’s binding. Close the door slowly and watch the reveal around the door frame; the tight spot usually shows as a narrowing gap.
Slide a thin strip of paper or a feeler gauge around the perimeter to locate where it snags. Mark the rub with painter’s tape, then open the door and transfer the mark to the door edge with a pencil.
Use lipstick, chalk, or graphite on the suspect edge, close once, and look for witness marks on the door frame.
Check door alignment by sighting along the hinge side and latch side; note any twist or sag before you remove material.
Tighten Hinges and Replace Short Screws
Once you’ve marked the rub point, check the hinges next—loose hardware is the fastest, cleanest fix for a sticking interior door. Pop off Decorative hinge covers if you have them, then use a #2 Phillips or impact driver to snug every hinge screw.
If a screw just spins, back it out and replace it with a 3-inch wood screw so it bites the stud framing. Drive it straight; don’t over-torque and strip the head.
Recheck the top hinge first, since it carries the load. While you’re there, add a drop of hinge lubrication at the knuckle and work the door open/closed to pull it in. Wipe excess so it won’t attract grit, and retest swing and latch.
Shim Hinges to Realign a Sticking Door
Check the reveal and rub marks to confirm the hinge side is causing the bind, then pull the hinge pin or back out the screws to loosen that hinge leaf.
Cut a thin shim from cardboard, veneer, or a purpose-made hinge shim and place it behind the hinge leaf that needs to move the door away from the jamb.
Rehang the hinge, snug the screws, and test the swing and latch, adding or removing shim thickness until the door clears cleanly.
Identify Rubbing Hinge Side
If the door drags near the latch edge but the gap at the hinge side looks tight or uneven, the hinges are usually pulling the slab out of alignment.
First, verify it isn’t just door frame expansion: check for seasonal swelling, then confirm the latch strikes cleanly when you lift the knob slightly.
Open the door halfway and look for shiny rub marks along the hinge stile and jamb. Slip a thin card or feeler gauge into the reveal; it’ll bind where the hinge side is rubbing. Mark contact points with painter’s tape.
Next, check hinge barrels for slop and listen for squeaks; do quick door hinge lubrication to rule out friction at the knuckles.
Finally, sight down the hinge leaves—any leaf proud of the mortise flags the problem.
Choose Proper Shim Material
With the hinge-side rub points marked and any proud hinge leaf confirmed, you’re ready to pick a shim that won’t crush, slip, or telegraph through the mortise. Use rigid, thin stock: brass shim, stainless feeler-gauge strips, or pre-cut plastic hinge shims.
Avoid cardboard, cereal box, or soft wood veneer; they compress under screw torque and the door drifts back into the door frame.
Match thickness to the correction: start at .005–.010 in and stack only if needed. Cut with tin snips or a sharp utility knife, then punch clean screw holes with an awl so the leaf seats flat.
If you’re using plastic, scuff it lightly for bite. Before assembly, wipe off oil and apply hinge lubrication only after shims are set.
Rehang And Test Swing
Once you’ve fitted the shim and punched the screw holes, hang the door back on the hinges and snug the screws by hand so the leaf seats fully without twisting. Start with the top hinge, then the middle, then the bottom to keep the reveal even.
Switch to a screwdriver or drill/driver on low torque and finish tightening, but don’t strip the door hardware.
Close the door slowly and watch the margins at the latch side and head. If it still rubs, mark the contact point with painter’s tape, then open and adjust: add a thinner shim, move it to a different hinge, or trim the shim with a utility knife.
Test the swing three times, checking latch engagement and that the door sits flush for clean interior aesthetics.
Adjust the Strike Plate on the Latch Side
Close the door slowly and watch where the latch hits the strike plate; if it rides high, low, or binds, you’ve got an alignment issue.
Loosen the strike plate screws with a screwdriver, shift the plate just enough to center the latch in the opening, then retest.
When it clicks cleanly, tighten the mounting screws firmly so the plate can’t creep back out of position.
Check Latch Alignment
If the door rubs and then “clicks” shut only when you lean on it, the latch likely isn’t lining up with the strike plate. Start by slowly turning the door knob and watching the latch mechanism extend and retract; it should move freely without scraping.
Close the door until it just touches the jamb, then mark where the latch hits using painter’s tape or a pencil. Check whether the latch bolt centers in the strike opening or contacts the top, bottom, or edge.
Use a flashlight to look for shiny rub marks on the latch and inside the strike. If the latch hits low or high, confirm the hinges aren’t loose before blaming the latch.
Also verify the door knob isn’t sagging on its spindle.
Reposition Strike Plate
Where the latch meets the strike plate determines whether the door catches cleanly or needs a shove, so adjust the strike before you start shaving wood. Close the door slowly and watch where the latch rubs the plate’s opening. Mark the high spot with a pencil.
Remove the strike plate, then use a flat file or a rotary tool to elongate the opening toward your mark; take off a little, test, and repeat. If the latch hits the plate’s face, lightly chamfer the edge with the file to guide it in.
Vacuum metal dust, then add a drop of graphite or dry lube as basic door lock maintenance. Finish with quick door hinge lubrication so the door swings freely while you test closure.
Tighten Mounting Screws
Before you start filing or moving hardware again, tighten the strike plate’s mounting screws so it can’t shift under the latch. Grab a #2 Phillips or your drill/driver with a clutch, and snug both screws until the plate sits flat.
If the heads spin without tightening, the screw holes in the door frame are stripped. Back the screws out, pack each hole with a toothpick and wood glue, or swap to longer 3-inch screws that bite into solid framing.
Reinstall the strike plate, then tighten evenly so you don’t twist it out of alignment. Check that the latch bolt enters the opening cleanly and the door closes without rubbing.
Solid door hardware starts with a firm, immobile strike.
Sand or Plane the Sticking Edge (Without Damage)
Once you’ve pinpointed the rub spot, remove the door and take down the sticking edge in controlled passes rather than trying to “muscle it” in place. Pull the hinge pins, label hinge locations, and set the door on padded sawhorses.
If the bind is minor, start with a sanding block or 120-grit paper on a flat backer; keep the face square and check your line often.
For heavier contact, use a sharp block plane and take thin shavings with the grain, stopping to test-fit. Break the edge lightly so it won’t chip. Seal the fresh wood with door paint.
Rehang, verify clearance, and finish with hinge lubrication for a smooth swing.
Prevent Sticking Interior Doors With Humidity Control
Even if you’ve tuned the hinges and planed the edge, a damp house will make the door swell and rub again. Control moisture first so your fix lasts.
Set Humidity sensors on each floor and near problem doors; keep indoor RH around 35–50%. If readings spike after showers or storms, run a dehumidifier and log the change for a week.
Dial in dehumidifier placement: put the unit in the most humid zone (basement, laundry, or hallway outside a bath), leave 6–12 inches of clearance, and route the drain hose to a floor drain or sink so it can run continuously.
Add a bath fan timer, and seal gaps around exterior doors to cut incoming moisture.
Frequently Asked Questions
How Much Does It Cost to Fix a Sticking Interior Door Professionally?
You’ll pay $75–$250, because your door loves drama. Pros use door hinge lubrication, tighten screws, plane edges, and do door frame adjustments with shims, levels, and a pry bar; parts add $10–$40.
When Should I Replace the Entire Door Instead of Repairing It?
Replace the entire door when you’ve tried door frame adjustment and hinge lubrication, yet it still binds, twists, or shows water damage. If the slab’s warped, delaminated, or the hinge mortises are blown out, swap it.
Can Sticking Doors Indicate Foundation Settling or Structural Problems?
Yes, sticking doors can signal foundation shift or structural damage, especially if multiple doors misalign suddenly. You should check gaps with a tape measure, use a level on frames, and inspect for drywall cracks nearby.
What Tools Do I Need to Fix a Sticking Door Safely?
You’ll need a screwdriver set, shims, a level, sandpaper, and a block plane; 80% of sticking fixes use these. Add spray lube for hinge lubrication, a mallet for door frame adjustment, and safety glasses.
Are There Building Code or Rental Rules About Repairing Interior Doors?
You’ll usually face no building-code issues, but your lease may restrict repairs—get written approval. Use door hinge lubrication and check door frame alignment. Avoid trimming fire doors, altering latches, or removing closers.
About the Author