You can restore an old patio if you start with a quick inspection, then work in a controlled sequence: clean, re-point, seal. You’ll map cracked slabs, loose edges, and washed-out joints before you choose polymeric sand or a flexible mortar. Next, you’ll test pressure and chemistry on a small area so you don’t etch the surface. Once joints cure, sealing becomes the final control point—but only if conditions are right…
Key Takeaways
- Inspect the patio for cracks, loose slabs, joint loss, and drainage problems; confirm a consistent slope away from the house.
- Sweep and scrape debris first, then pressure-wash with a 25–40° tip; test a small area to avoid etching.
- Use a pH-appropriate cleaner for the soil type, rinse thoroughly, control runoff, and let the patio dry completely.
- Rake joints 15–25 mm deep, vacuum fines, then pack polymeric sand or flexible mortar in lifts and strike just below edges.
- After jointing cures 48–72 hours, seal on a dry, cool day with a penetrating or wet-look sealer, avoiding puddles and back-rolling evenly.
Inspect Patio Damage and Choose a Repair Plan
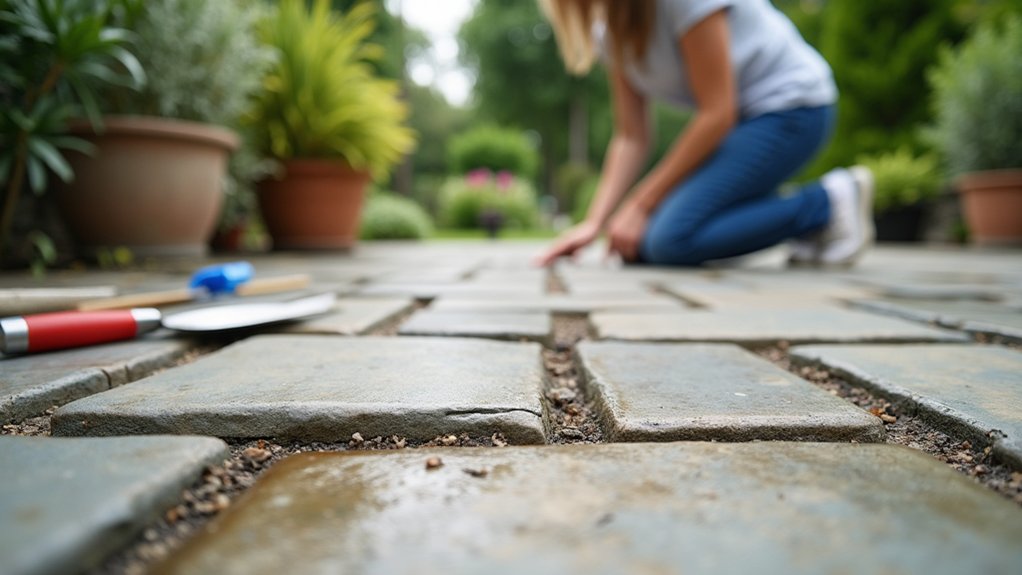
Start by asking: where’s the patio actually failing? Walk the surface in a grid and mark cracked slabs, rocking pavers, and depressions. Probe joints with a screwdriver to confirm whether mortar loss is superficial or tied to movement. Check edges and steps for settlement gaps that suggest patio foundation instability.
Then verify slope with a 4‑ft level; you want consistent fall away from the house. Track water paths after rain and note puddling, spalling, or algae lines as evidence of drainage issues. Inspect downspouts, splash blocks, and nearby soil grades that may be feeding runoff onto the patio.
Choose repairs by cause: re-point stable joints, reset displaced units, or address base and runoff first.
Clean the Patio: Pressure Wash or Chemical?
Once you’ve mapped cracks, settlement, and drainage paths, clean the surface so you can see sound material versus stain, biofilm, and loose mortar.
Start dry: sweep, scrape algae, and vacuum grit so you don’t drive abrasives into pores. If you pressure wash, use a 25–40° tip, keep the wand moving, and stay at a consistent standoff distance; test a corner first to avoid etching softer stone or spalling weak concrete.
Use the lowest PSI that lifts dirt. For chemicals, choose cleaning agents matched to soil type and confirm pH balance with the patio material; avoid strong acids on calcareous stone and harsh alkalis on some bricks.
Rinse thoroughly, control runoff, and let the slab dry fully before proceeding.
Repoint Patio Joints to Stop Weeds
After the patio dries completely, repoint the joints so weeds can’t re-root and water can’t undermine the bedding layer. Rake out loose mortar or sand to a consistent depth, ideally 15–25 mm, using a jointing tool; don’t widen the gaps. Brush out fines and vacuum the joints so the new material bonds and compacts properly.
Choose a jointing compound suited to your paving: polymeric sand for narrow joints, or a flexible mortar for wider joints where slight movement demands joint flexibility. Lightly dampen the slabs if required by the product, then pack the joints in lifts, compacting with a pointing trowel.
Strike the finish just below the arrises and sweep off residue. Proper compaction is your main weed prevention measure.
Seal the Patio for Colour and Protection
Let the new jointing cure fully, then seal the patio to lock in colour, reduce staining, and slow water uptake through both the slabs and the joints. Check the jointing and sealer datasheets; most need 48–72 hours dry cure and no rain forecast.
Sweep and vacuum grit, then spot-clean any efflorescence so it won’t get trapped.
Choose a penetrating sealer for minimal sheen, or a wet-look product for color enhancement. Test a small area to confirm finish and slip resistance.
Apply on a dry day, slabs below 25°C. Use a low-pressure sprayer or roller, keep a wet edge, and avoid pooling in joints. Back-roll to even coverage.
Apply a second coat if specified. This gives consistent surface protection.
Frequently Asked Questions
Will Sealing Make the Patio Surface Slippery When Wet?
Yes, sealing can make your patio slippery when wet, depending on product and finish. You’ll preserve slip resistance by choosing a penetrating, matte sealer and adding anti-slip grit. Test sealing effects on a small area first.
How Long Should I Wait Before Using the Patio After Sealing?
You should wait 24 hours before light foot traffic and 48–72 hours before heavy use. For sealing durability, extend cure time if weather impact includes high humidity, low temperatures, or rain; verify tack-free finish.
Can I Restore Patio Colour Without Using a Sealer?
Like chasing sunlight through fog, you can’t reliably restore patio color without a sealer. You can try patio color enhancement via deep cleaning and gentle acid wash; natural finish restoration stays limited and fades quickly.
What’s the Best Way to Prevent Efflorescence on Newly Repointed Joints?
Prevent efflorescence by controlling moisture: use low-salt mortar, proper curing, and good drainage. For Efflorescence prevention and joint maintenance, you’ll avoid overwatering, keep joints dense, and stop wash-water pooling.
Should I Cover or Protect Nearby Plants During Cleaning and Sealing?
Yes—you should cover and protect nearby plants during cleaning and sealing. Use Plant protection: wet foliage and soil, then apply Chemical shielding with breathable fabric or plastic. Rinse immediately after overspray, and avoid windy conditions.
About the Author