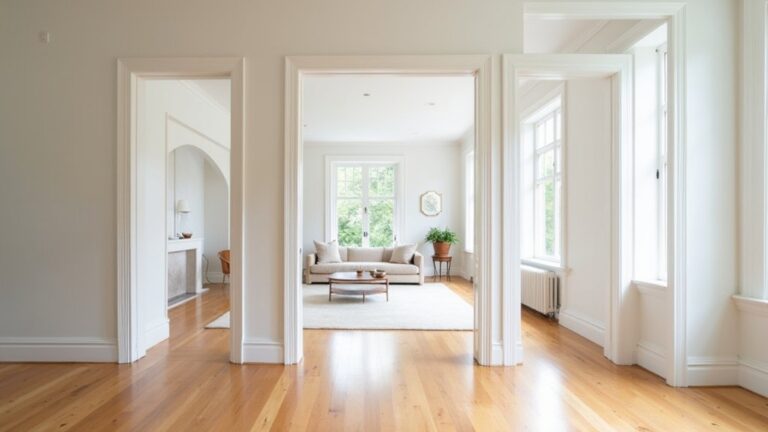
When you renovate a compact ensuite, you need to treat every millimetre like usable space and confirm clearances before you buy fixtures. You’ll map door swings, shower entry widths, and toilet side/front setbacks so circulation stays code-compliant. If plumbing locations can’t move, you can still gain room with short-projection fittings, a walk-in shower with a fixed glass panel, and wall-hung storage that keeps the floor clear—but the biggest space wins usually come from one specific layout decision…
Key Takeaways
- Start with a scaled plan, confirming code-compliant clearances for doors, vanity, shower entry, and toilet circulation.
- Keep fixtures close to the existing wet wall to reduce plumbing costs and avoid complex drain, vent, and waterproofing changes.
- Choose space-saving fixtures: wall-hung or slim vanities, reduced-depth basins, compact toilets, and recessed medicine cabinets.
- Add in-wall storage like waterproofed niches and slim shower ledges, pitched to drain, to keep essentials off the floor.
- Increase perceived space with light-reflective finishes, large mirrors, layered lighting, and frameless glass shower panels.
Plan Your Compact Ensuite Layout and Clearances

Before you pick fixtures, map your compact ensuite on a scaled plan and lock in code-compliant clearances so everything fits and functions. Draw walls, windows, and the door swing, then reserve unobstructed circulation from entry to shower and toilet.
Keep required headroom and confirm you can meet minimum fixture clearances at the front and sides without encroaching on the doorway.
Optimize vanity placement by centering it on the clearest wall and maintaining comfortable approach space for drawers and elbows. Choose an in-swing or out-swing door based on collision checks with the vanity and toilet, or specify a pocket door where permitted.
Mark shower entry, glass panel, and towel bar zones so they don’t pinch movement. Re-check dimensions after selecting fixture sizes.
Keep or Move Plumbing in a Compact Ensuite
Start by mapping your existing supply and drain lines, vent route, and shutoff access so your fixture plan stays tight and code-compliant.
If you keep fixtures near the current stack and wet wall, you’ll save floor space and avoid costly slab cuts, joist notches, and permit-heavy changes.
If you move plumbing, price the full scope—drain slope, venting, waterproofing, patching, and inspection—before you lock in the layout.
Assess Existing Plumbing Layout
Where does your existing plumbing actually run—straight through a shared wet wall, across the subfloor, or down an exterior chase? Map supply lines, drain routes, vent stacks, and cleanouts before you touch layout.
In a compact ensuite, inches matter, so confirm joist direction, pipe diameters, and trap-arm lengths to keep slopes and venting code-compliant.
Trace how the plumbing system ties into the main stack, then check whether your current fixture placement already aligns with that wet zone.
Measure centerlines to studs and clearances to doors, shower glass, and vanity drawers.
Locate shutoff valves and access panels so you don’t bury service points.
If you’re in a condo, verify common-wall restrictions and firestopping requirements around penetrations.
Photograph everything before closing walls.
Cost Of Relocating Fixtures
Although shifting a toilet, shower, or vanity can open a better footprint in a tight ensuite, it usually drives the biggest cost jump because you’re paying to move drains and vents—not just supply lines.
In your cost analysis, treat the toilet as the priciest move: you’ll likely re-slope the 3-inch waste line, adjust vent tie-ins, and patch subfloor and ceiling below.
Moving a shower means reworking the trap, waterproofing transitions, and keeping required drain slope and curb/threshold height.
A vanity relocation is cheaper if you stay on the same wet wall, but code still dictates venting, cleanouts, and GFCI spacing.
For renovation budgeting, price extra inspections, permits, and access panels; avoid “creative” reroutes that shrink joists or block vent stacks.
Keep fixtures aligned when possible.
Choose Compact Ensuite Fixtures With Short Projections
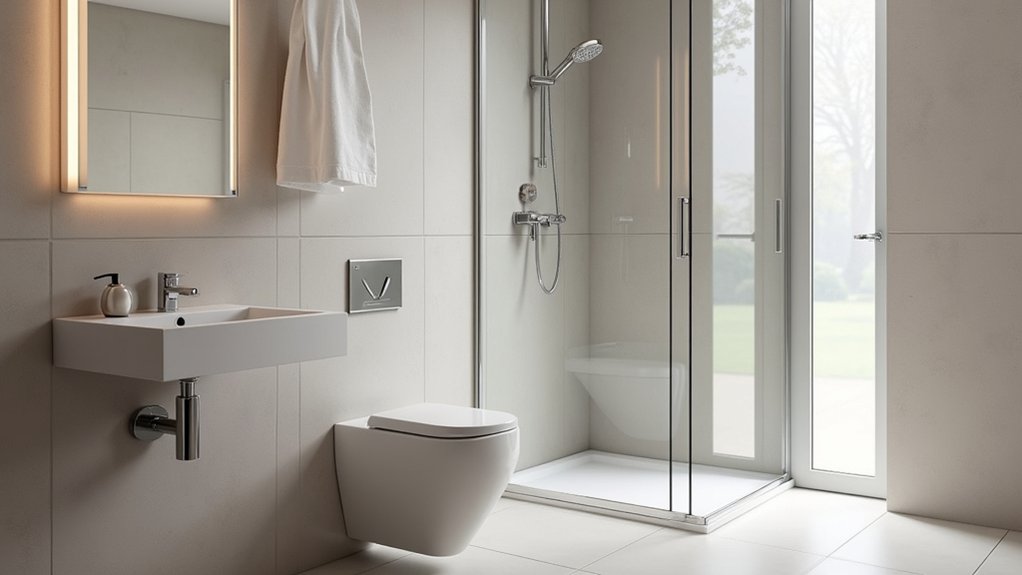
In a compact ensuite, how far each fixture projects off the wall can make or break your clearances. Choose Compact fixtures with Short projections so you keep required circulation and fixture-to-fixture spacing without crowding the door swing.
Look for wall-hung or slimline vanities, reduced-depth basins, and toilets with shorter bowls or in-wall tanks, while still meeting local code for minimum clearances in front of the WC and lavatory.
Specify a recessed or shallow medicine cabinet instead of a deep surface-mount unit at head height.
Pick a compact towel bar, robe hook, and toilet paper holder that don’t snag your hip line.
Confirm rough-in dimensions early so supply stops and traps fit inside the vanity without forcing it forward.
Use a Walk-In Shower to Free Up Floor Space
Because a swinging shower door can steal the same clearance you need for the WC or vanity, a walk-in shower gives you back usable floor area and simplifies circulation in a compact ensuite.
Use a fixed glass panel with an open entry sized to meet local access and egress requirements, and keep splash control tight with a return panel or ceiling-mounted rain head placed away from the opening.
Build a compliant slope to the drain (typically 1:50–1:60) and specify a linear drain to reduce threshold height and keep progressions flush.
Choose Tile patterns that visually widen the room—large-format, light-toned tiles laid lengthwise—and align grout joints to avoid awkward cuts.
Confirm Ventilation options: an appropriately rated exhaust fan, short duct run, and moisture-resistant finishes.
Add a Wall-Hung Vanity and Slimline Storage
When you swap a floor-standing unit for a wall-hung vanity, you open up visible floor area and make a tight ensuite feel wider without moving plumbing.
Choose Wall mounted vanities with a narrow depth (400–450 mm) so you maintain required clearances in front of the basin and keep door swings unobstructed. Mount blocking in the wall, fix to studs, and confirm the unit’s load rating suits stone tops and daily use.
Pair it with Slimline storage: a tall, shallow cabinet (150–250 mm deep) or mirrored shaving cabinet above the basin to shift toiletries off the counter.
Specify soft-close drawers with full-extension runners, and keep electrical outlets GFCI/RCD-protected and away from splash zones.
Finish with a wall-mounted tap to reduce bench depth further.
Build Recessed Niches and Ledges for Compact Storage
Place your recessed niche where you can reach it without stepping into the spray zone, and align it with stud bays so you don’t compromise framing or required clearances.
You’ll need a fully waterproofed box—continuous membrane, properly lapped corners, and mold-resistant sealant at all changes of plane—to keep the assembly code-compliant and leak-free.
Add a slim ledge along a short wall or beneath the niche with a slight slope and a drip edge so you gain storage without stealing elbow room.
Optimal Niche Placement
Where can you carve out storage without stealing an inch of floor space? Place a recessed niche on the plumbing wall only if you can keep full stud depth; otherwise, use an adjacent interior wall to avoid conflicts.
In showers, set the niche 44–52 inches above the finished floor so bottles sit within easy reach, and align it with grout lines for clean cuts. Keep it outside required grab-bar zones and clear of valves, body sprays, and shower door swing.
A double-height niche works best on narrow walls; a long ledge fits along the back wall when you can’t widen. Choose durable niche material like solid-surface or tile-ready foam, and add low-profile niche lighting from a listed wet-location fixture.
Waterproofing And Sealant Details
Because a niche or ledge interrupts your shower’s continuous water barrier, you’ve got to rebuild that waterproofing layer with no shortcuts: slope every horizontal surface 1/8–1/4 inch per foot toward the drain, wrap the recess with a listed waterproofing system (sheet or liquid) tied into the main wall membrane, and seal all plane changes with compatible banding plus inside/outside corners.
Use cement board or an approved foam backer, not drywall, and keep fasteners out of waterproof zones. Maintain manufacturer-required overlaps, cure times, and wet-film thicknesses so your moisture barriers meet code intent.
At tile, grout doesn’t waterproof—tool flexible sealant at changes of plane, and leave movement joints clear. Add a drip edge on the niche sill to limit runoff.
These steps drive Mold prevention and long-term durability.
Space-Saving Ledge Designs
Once your waterproofing and sealant details are locked in, you can add compact storage without stealing elbow room by building recessed niches and slim ledges that sit flush with the tile plane.
Frame niches between studs, keep headers level, and confirm you’re not cutting structural members or plumbing runs. Use a listed niche box or fully wrap the cavity with a bonded waterproof membrane, then slope the niche base 1/8 inch per foot to the drain so water can’t pond.
Cap ledges with a solid-surface or bullnose piece, pitched slightly inward. For daily items, add floating shelves outside the wet zone, anchored into blocking.
In shower areas, choose wall mounted ledges with concealed brackets and sealed penetrations for code-sound durability.
Use Lighting and Light Colours to Widen the Room
Although your ensuite’s footprint won’t change, you can make it read wider by pairing code-compliant lighting with a light, reflective colour palette. Start with layered ambient lighting: a sealed, damp-rated ceiling fixture for general light, then add a vanity light that’s wet-location rated if it’s within splash zones. Keep all fittings on a GFCI/RCD-protected circuit and follow required clearances from the shower and bath.
Choose pastel shades and warm whites with a high light-reflectance value on walls and ceilings to push boundaries outward. Use satin or semi-gloss where permitted for extra bounce and easier cleaning.
Match grout and trim to tile to reduce visual breaks, and select light-toned flooring so the room reads continuous and wider.
Add Mirrors, Glass, and Space-Smart Finishing Touches

Light and pale finishes set the stage, then mirrors and glass take over by multiplying that brightness and keeping sightlines open. Mount a large mirror over the vanity, extend it to the backsplash, and keep edges safe with polished or beveled glass.
Choose mirror styles that match your storage: recessed medicine cabinets preserve inches and can be code-friendly when they don’t project into required clearances. Add decorative framing only if it’s slim, moisture-rated, and doesn’t crowd task lighting.
Swap a shower curtain for a frameless or semi-frameless glass panel; specify tempered safety glass, sealed joints, and a sweep to limit splash.
Finish smart: wall-mounted accessories, a narrow towel bar, and coordinated hardware keep surfaces clear and circulation unobstructed.
Frequently Asked Questions
How Much Does a Compact Ensuite Renovation Typically Cost?
You’ll typically pay $8,000–$20,000 for a compact ensuite renovation, even if you worry it’s too small to matter. Cost considerations include plumbing moves, waterproofing, permits. Budget planning prioritizes code-compliant ventilation, clearances, fixtures, finishes.
Do I Need Permits or Building Approval for an Ensuite Remodel?
You’ll often need permits or building approval if you move plumbing, electrics, or walls; cosmetic swaps usually don’t. Check local Permit requirements and approval processes, guarantee waterproofing, ventilation, and clearances meet code for tight layouts.
How Long Does a Small Ensuite Renovation Usually Take?
You’ll usually finish a small ensuite renovation in 2–4 weeks, but permits, inspections, and lead times can stretch it to 6. You’ll speed things up with finalized color schemes and storage solutions.
What Waterproofing Standards Should My Contractor Follow?
You should insist on Waterproofing standards matching your local building code and manufacturer specs, including wet-area membranes, sealed penetrations, and flood testing. Put Contractor requirements in writing: licensed installer, inspection signoff, documented photos, warranty.
What Ventilation System Is Best for Preventing Mould in Tiny Ensuites?
Most mould starts when RH stays above 60%; choose a quiet, code-compliant 80–110 CFM exhaust fan ducted outdoors, with a humidity sensor and timer. This tops Ventilation options for Mold prevention in tiny ensuites.
About the Author